ProjexaGo User Manual
Complete guide to managing your business on ProjexaGo
Chapter 1 — Introduction & Product Overview
What is ProjexaGo?
ProjexaGo is the commerce operating system for growing businesses. It is a multi-tenant SaaS platform that enables any business — without technical knowledge — to launch a complete public storefront, manage orders, handle customers, and run the entire commercial cycle from a single place.
Unlike traditional store builders, ProjexaGo is not limited to online payment gateways. It is designed specifically for businesses that operate with manual payments — bank transfers, digital wallets, in-person payments — and need a system that handles the complete flow: from order placement to confirmed payment.
In short: ProjexaGo gives any business a public storefront, product catalog, shopping cart, manual payment workflow, customer notifications, AI tools, analytics, and a powerful the platform — all from a single configuration, without writing a single line of code.
Who is ProjexaGo for?
ProjexaGo is designed for:
| Business Type | Example Use |
|---|---|
| Local retailers & cafés | Bank transfer and wallet payments with delivery tracking |
| Boutiques & makers | Visual catalog, featured products and AI-written descriptions |
| Distributors | Order pipeline, customer history and low-stock alerts |
| Restaurants | Menus, manual payment instructions and order status notifications |
| Pop-ups & campaigns | Branded portal live in minutes with a custom domain |
| Services & consulting | Sell services with manual payment tracking and confirmation |
Value Proposition
- No code. Everything — branding, catalog, payments, emails and AI — is configured through the wizard and management panel.
- Live in minutes. The guided wizard generates your complete portal in a single session.
- Multi-tenant & isolated. Each business is an independent tenant. Your products, orders, customers and settings are exclusively yours.
- Bring your own email & AI. Connect your own SMTP provider, OpenAI or Anthropic. Keys are encrypted at rest.
- 0% transaction fees. ProjexaGo doesn't charge commission on your sales.
- Custom domain ready. On paid plans, connect your own domain with automatic SSL.
System Components
ProjexaGo consists of three main elements that work together:
1. The Management panel (Owner Panel)
The web interface where you manage your entire business:
- Dashboard with real-time KPIs and metrics
- Product, category and catalog management
- Order pipeline with status workflow
- Payment proof review queue
- Customer CRM
- Complete portal configuration
- Integrated AI tools
- Reports and analytics
URL: https://app.projexago.com
2. The Public Portal (Customer Storefront)
The public store your customers see:
- Branded landing page with hero, sections and CTAs
- Navigable catalog with search and filters
- Product pages with images and variants
- Shopping cart and checkout process
- Customer registration and login
- Order tracking with unique token
- Payment proof upload
- Order history and invoice downloads
- Support cases from the store
URL: https://[your-store].projexago.com or your custom domain
3. The Mobile App (ProjexaGo App)
The native app for managing your business from your phone:
- Dashboard with daily sales and metrics
- Order viewing and management
- Product catalog
- Customer list
- Portal settings
- Available as PWA (install from browser) and coming soon to App Store and Google Play
General Workflow
The complete cycle of an operation in ProjexaGo follows these steps:
1. Create your organization
   └── Your account is created automatically as owner

2. Configure your branding
   └── Logo, colors, typography

3. Run the creation wizard
   └── Design, layout, categories, products, payment methods

4. Generate your portal
   └── Public storefront + management panel ready

5. Publish your landing
   └── ProjexaGo subdomain or your own custom domain

6. Customers register & shop
   └── Browsers create accounts, browse the catalog and place orders

7. Receive orders
   └── Send instructions → customer pays → uploads proof

8. Manage from the platform
   └── Approve payments, update statuses, full tracking
System Requirements
Management panel (web)
- Browser: Google Chrome 110+, Firefox 115+, Safari 16+, Edge 110+
- Internet: Broadband recommended (minimum 5 Mbps)
- Resolution: 1280×720 minimum; 1440×900 or higher recommended
Public Portal (customers)
- Any modern browser, including mobile
- No special installation requirements
Mobile App
- iOS: 15.0 or higher (install from Safari as PWA)
- Android: Chrome 100+ (install from Chrome as PWA)
- App Store and Google Play: coming soon
Manual Conventions
Throughout this manual you will find the following indicators:
💡 Tip: Recommendations to get the most out of the platform.
⚠️ Important: Critical information you must be aware of.
📌 Note: Additional clarifications about system behavior.
🔄 Workflow: Description of a multi-step process.
Chapter 2 — The Landing Page (projexago.com)
Overview
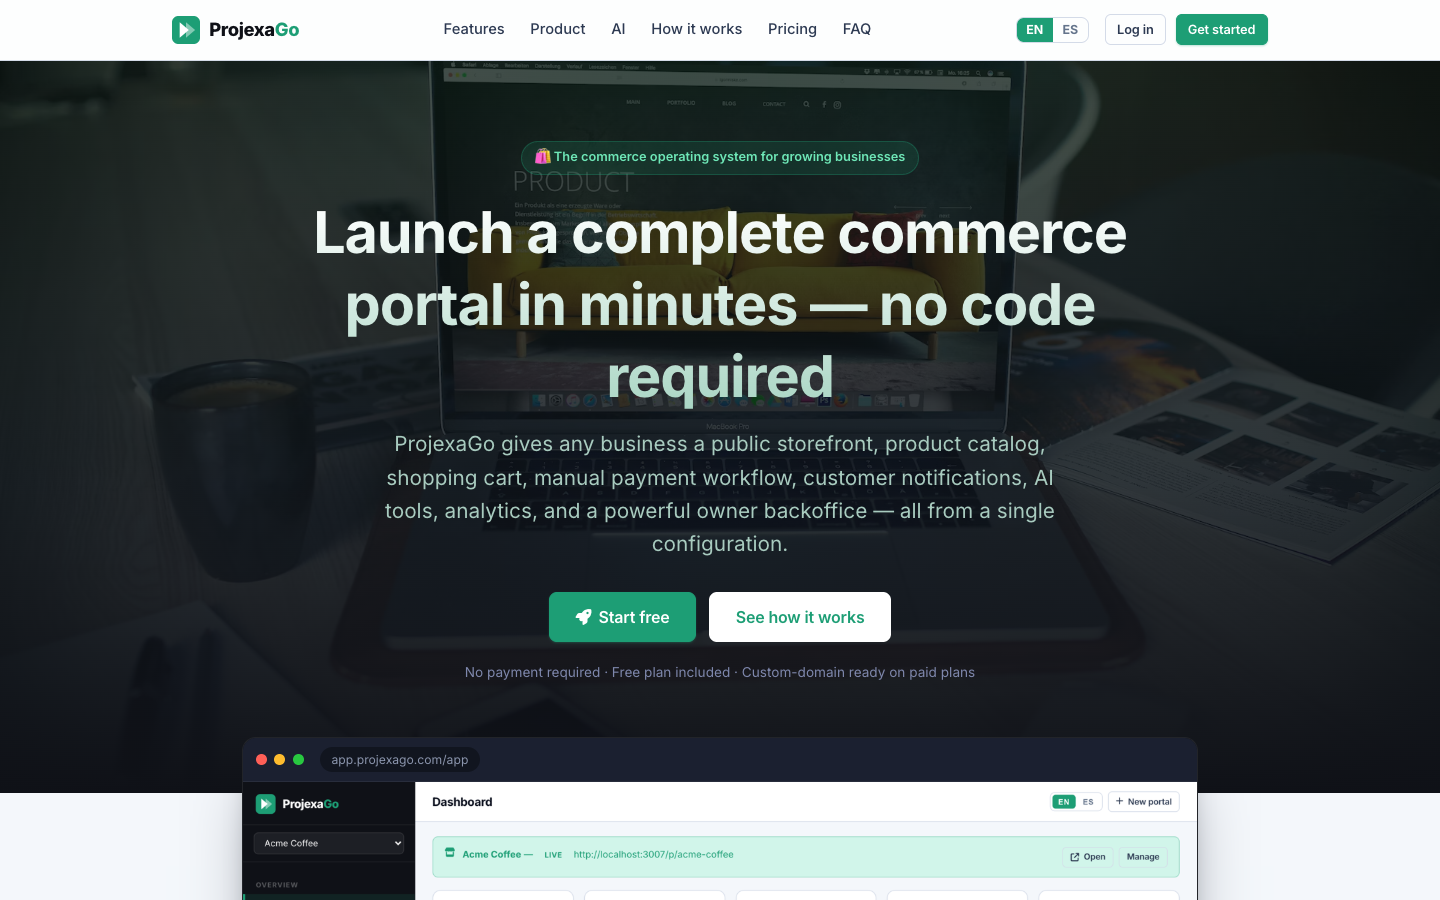
The ProjexaGo landing page at https://projexago.com is the official entry point to the product. It is designed so any visitor can quickly understand the value proposition, explore features, compare plans and make the decision to get started.
Main Navigation
At the top of the page you'll find a fixed navigation bar:
| Element | Function |
|---|---|
| ProjexaGo (logo) | Returns to the top of the page |
| Features | Scrolls to the features section |
| Product | Scrolls to the product description section |
| AI | Scrolls to the AI section |
| How it works | Shows the 8-step product flow |
| Pricing | Scrolls to the plans and pricing section |
| FAQ | Shows frequently asked questions |
| EN / ES | Language switcher (English / Spanish) |
| Log in | Access the panel if you already have an account |
| Get started | Starts the registration process (primary CTA) |
Hero Section
Tagline:
🛍️ The commerce operating system for growing businesses
Headline:
Launch a complete commerce portal in minutes — no code required
Description:
ProjexaGo gives any business a public storefront, product catalog, shopping cart, manual payment workflow, customer notifications, AI tools, analytics, and a powerful the platform — all from a single configuration.
Action buttons:
- Start free — Goes to registration (no credit card required)
- See how it works — Scrolls to the "How it works" section
Note below buttons:
No payment required · Free plan included · Custom-domain ready on paid plans
Visual highlights:
- Launch in minutes — no code
- Multi-tenant & isolated by design
- Bring your own email & AI
- Custom-domain ready
Features Section
Title: "EVERYTHING YOU NEED TO SELL" Subtitle: Not a store builder. A commerce operating system.
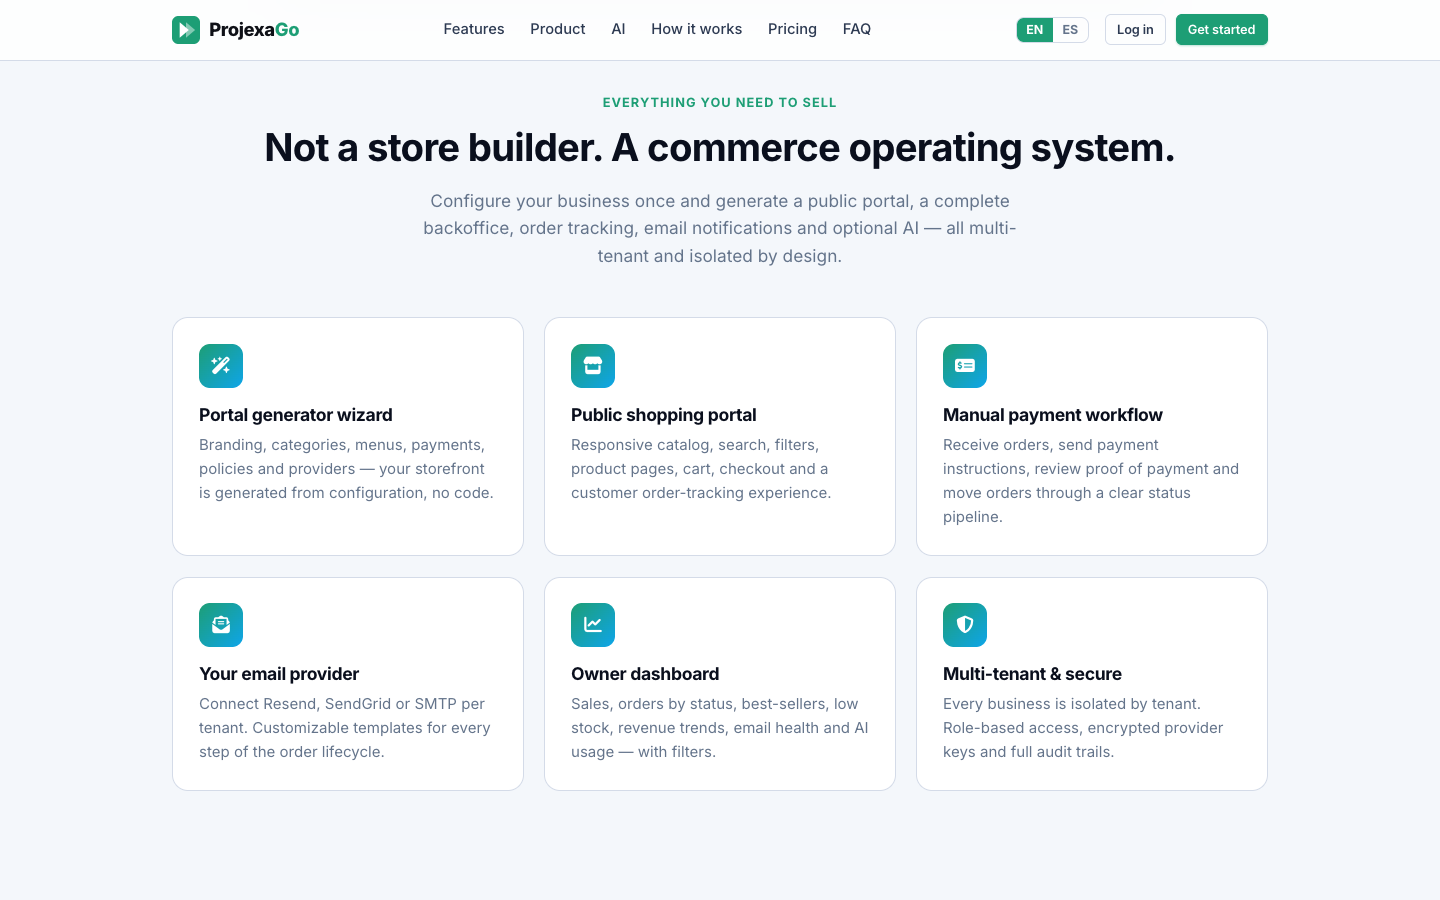
1. Portal Generator Wizard
Branding, categories, menus, payments, policies and providers — your store is generated from your configuration, no code required.
2. Public Shopping Portal
Responsive catalog, search, filters, product pages, cart, checkout and order tracking for the customer.
3. Manual Payment Workflow
Receive orders, send payment instructions, review proof and advance orders through a clear status flow.
4. Your Own Email Provider
Connect Resend, SendGrid or SMTP per tenant. Customizable templates for every step of the order cycle.
5. Owner Panel
Sales, orders by status, best sellers, low stock, revenue trends, email health and AI usage — with filters.
6. Multi-tenant & Secure
Each business is isolated by tenant. Role-based access, encrypted provider keys and complete audit logs.
Product Preview Section
Four views showcasing real interface screenshots:
- Design your portal with live preview — The wizard shows your store in real time as you configure it
- A fast, branded storefront for your customers — The responsive public store with catalog and cart
- Operate everything from one place — The platform with dashboard, orders and management
- Activate AI when you're ready — The integrated AI assistant with analysis and content generation
How It Works Section
Title: "FROM REGISTRATION TO MANAGING ORDERS" Subtitle: The real ProjexaGo flow — the complete cycle, as the platform works today — no hidden steps, no "coming soon".
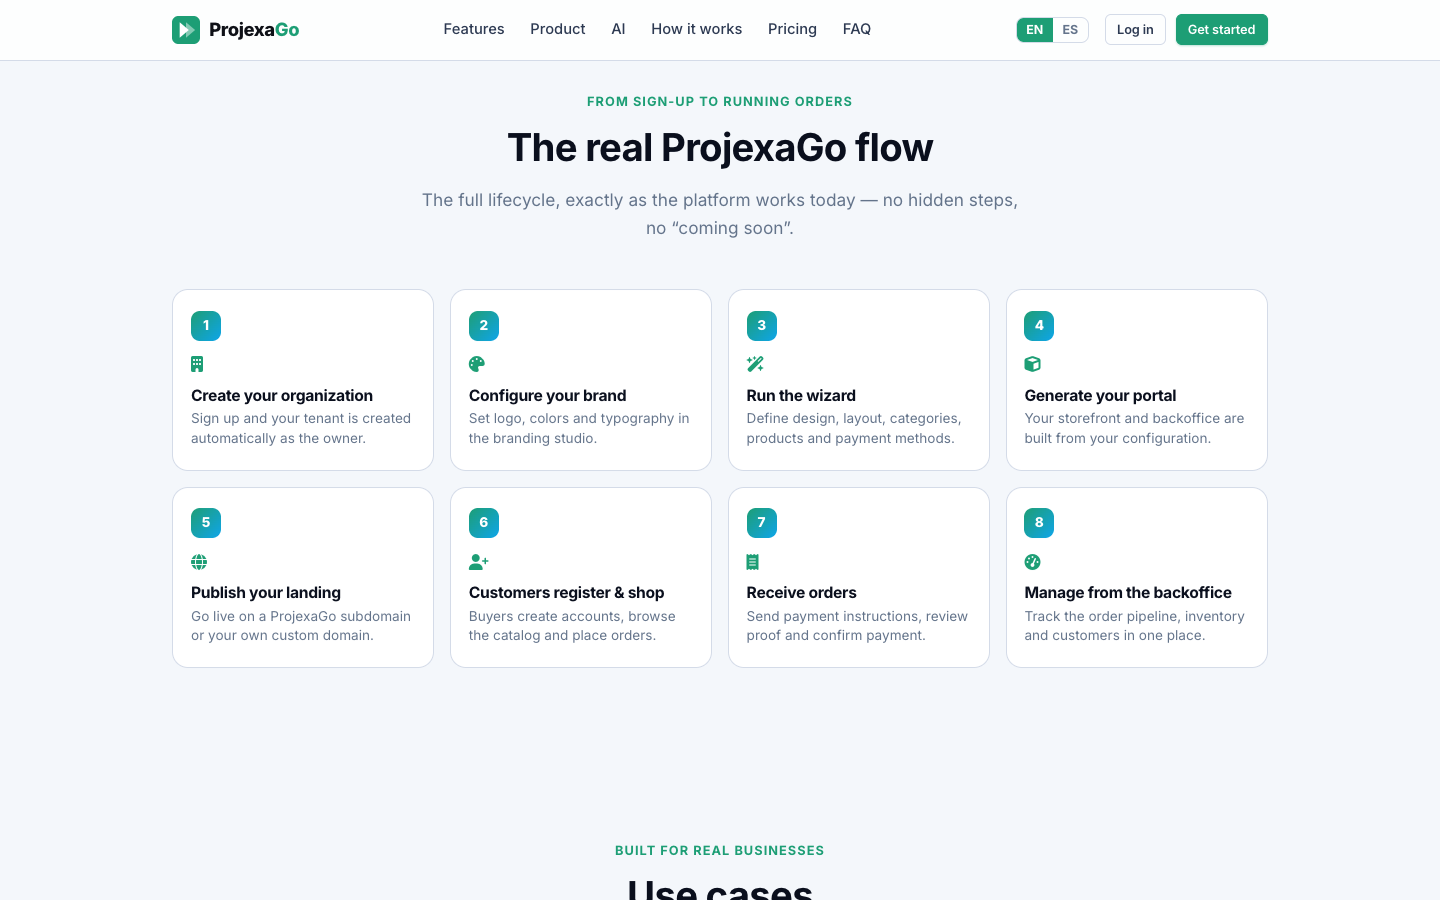
| Step | Action | Description |
|---|---|---|
| 1 | Create your organization | Register and your tenant is created automatically as owner |
| 2 | Configure your branding | Set logo, colors and typography in the brand studio |
| 3 | Run the wizard | Define design, layout, categories, products and payment methods |
| 4 | Generate your portal | Your storefront and management panel are built from your configuration |
| 5 | Publish your landing | Go live on a ProjexaGo subdomain or your own custom domain |
| 6 | Customers register & shop | Buyers create accounts, browse the catalog and place orders |
| 7 | Receive orders | Send payment instructions, review proof and confirm payment |
| 8 | Manage from the platform | Track the order pipeline, inventory and customers in one place |
Use Cases Section
Title: "BUILT FOR REAL BUSINESSES"
| Use case | Description |
|---|---|
| Local retailers & cafés | Bank transfer and wallet payments with proof review and delivery tracking |
| Boutiques & makers | Beautiful catalog, featured products and AI-written descriptions |
| Distributors | Order pipeline, customer history and inventory alerts in one management panel |
| Restaurants | Menus, manual payment instructions and order status notifications |
| Pop-ups & campaigns | Spin up a branded portal in minutes with a custom domain |
| Services & consulting | Sell services with manual payment tracking and confirmation |
Pricing Section
Title: "Plans that grow with you"
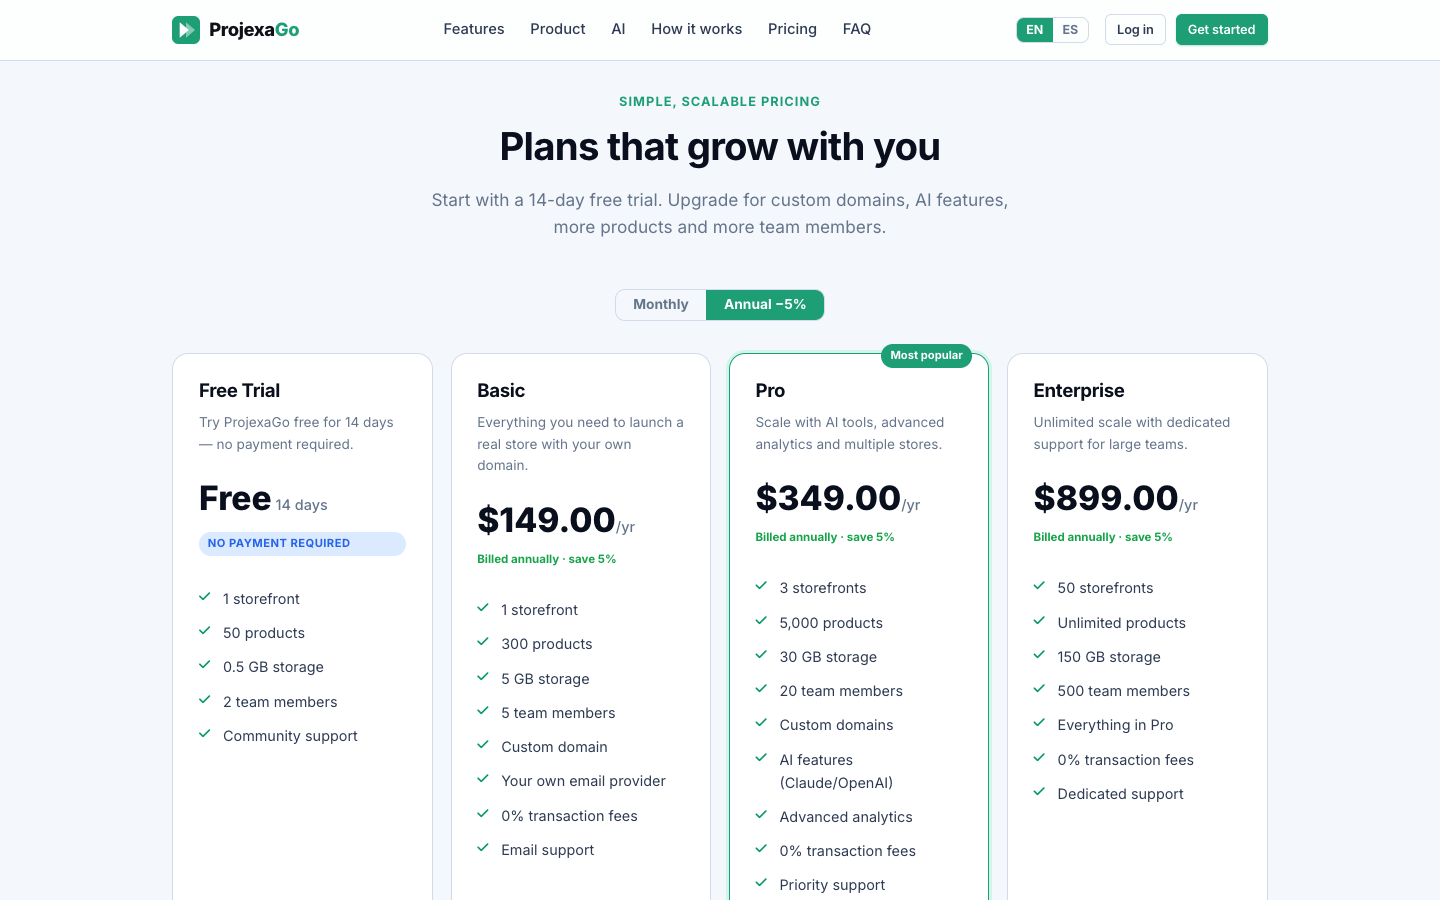
Free Trial
Try ProjexaGo free for 14 days — no payment required.
| Feature | Value |
|---|---|
| Price | Free, 14 days |
| Stores | 1 |
| Products | 50 |
| Storage | 0.5 GB |
| Team members | 2 |
| Support | Community |
Basic Plan — $149.00/year
Everything you need to launch a real store with your own domain.
| Feature | Value |
|---|---|
| Price | $149.00/year (billed annually · save 5%) |
| Stores | 1 |
| Products | 300 |
| Storage | 5 GB |
| Team members | 5 |
| Custom domain | ✅ |
| Own email provider | ✅ |
| Transaction fees | 0% |
| Support |
Pro Plan — $349.00/year ⭐ Most Popular
Scale with AI tools, advanced analytics and multiple stores.
| Feature | Value |
|---|---|
| Price | $349.00/year (billed annually · save 5%) |
| Stores | 3 |
| Products | 5,000 |
| Storage | 30 GB |
| Team members | 20 |
| Custom domains | ✅ |
| AI features (Claude/OpenAI) | ✅ |
| Advanced analytics | ✅ |
| Transaction fees | 0% |
| Support | Priority |
Enterprise Plan — $899.00/year
Unlimited scale with dedicated support for large teams.
| Feature | Value |
|---|---|
| Price | $899.00/year (billed annually · save 5%) |
| Stores | 50 |
| Products | Unlimited |
| Storage | 150 GB |
| Team members | 500 |
| Everything in Pro | ✅ |
| Transaction fees | 0% |
| Support | Dedicated |
💡 Tip: If you're not sure which plan to choose, start with the Free Trial. You have 14 full days to explore the platform without entering payment information.
📌 Note: Extra storage is available at $1.00/GB/month billed in arrears. Additional stores can be purchased for $5.00/month.
FAQ Section
Do I need to write any code?
No. Everything — branding, catalog, payments, emails and AI — is configured through the wizard and management panel.
How do payments work?
ProjexaGo uses a manual payment workflow. A customer places an order, you send payment instructions (bank transfer, wallet, or in person), the customer pays outside the system and uploads proof, and you review and approve it from your payment queue. Every step updates the order status and notifies the customer by email.
Is my data isolated from other businesses?
Yes. ProjexaGo is multi-tenant by design. Every product, order, customer, email and AI setting is scoped to your tenant and never shared.
Can I use my own email and AI providers?
Yes. Connect Resend, SendGrid or SMTP for email, and bring your own OpenAI or Anthropic key for AI. Keys are encrypted at rest.
Can I use a custom domain?
Yes. On paid plans, add your domain, point the DNS, and ProjexaGo automatically provisions an SSL certificate. The process takes minutes.
Footer
Product navigation: Features · Pricing · AI Account: Log in · Sign up Legal: Terms & Conditions · Privacy Policy · Acceptable Use Copyright: © 2026 ProjexaGo. All rights reserved.
Previous: Chapter 1 — Introduction | Next: Chapter 3 — Registration & Plans →
Chapter 3 — Registration & Plan Selection
Creating Your ProjexaGo Account
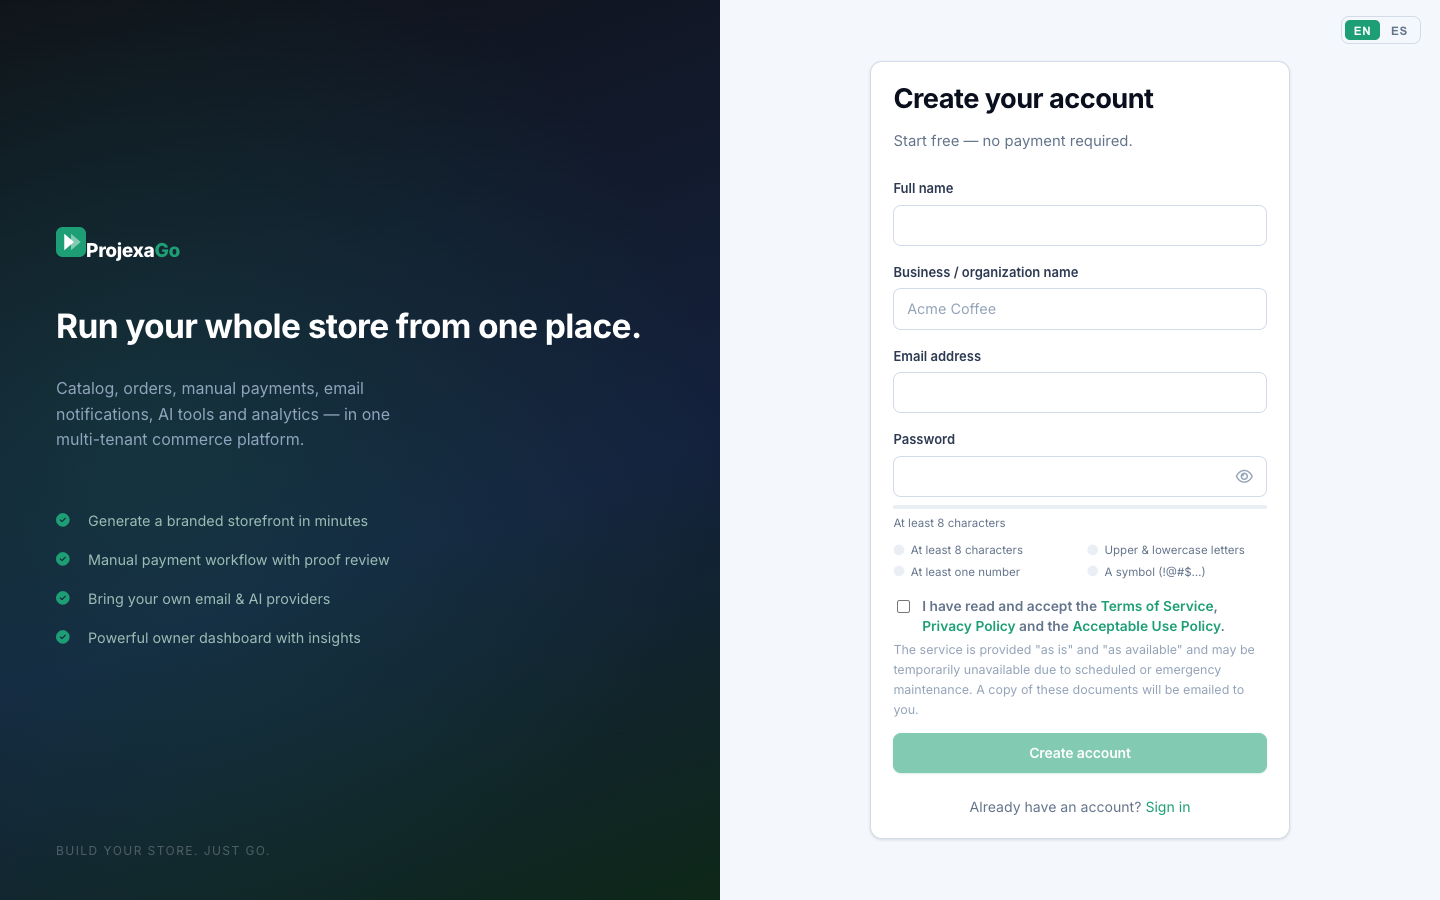
Go to https://projexago.com and click "Get started" or "Start free" to reach the registration screen at https://app.projexago.com/register.
Registration Form Fields
| Field | Description | Required |
|---|---|---|
| Full name | Your first and last name | ✅ |
| Email address | Valid email (becomes your username) | ✅ |
| Password | Minimum 8 characters, letters and numbers | ✅ |
| Organization name | Your company or business name | ✅ |
⚠️ Important: The email you enter becomes your permanent username. Use an address you will always have access to, ideally a business email.
Legal Acceptance
Before completing registration you must accept:
- Terms & Conditions
- Privacy Policy
- Acceptable Use Policy
A copy of the accepted terms is sent to your email for your records.
Plan Selection
After registration you are guided to plan selection:
Option A: Free Trial (recommended) Explore the full platform for 14 days, no payment required.
- 1 store, 50 products, 0.5 GB storage, 2 team members
Option B: Paid plan
| Plan | Annual Price | Best for |
|---|---|---|
| Basic | $149.00/yr | Single store, getting started |
| Pro | $349.00/yr | Multiple stores with AI tools |
| Enterprise | $899.00/yr | Large teams, unlimited scale |
Paid Plan Activation Flow
1. Select plan → charge created (pending)
2. Receive payment instructions by email
3. Make payment outside the system
4. Upload payment proof
5. ProjexaGo team reviews: received → in validation → approved
6. Account activated → access unlocked
⚠️ Important: While pending activation you cannot create portals. You can view your activation status from the platform.
Password Recovery
- Go to the login page → "Forgot your password?"
- Enter your registered email
- Follow the recovery link in your inbox
- Set a new password
Previous: Chapter 2 — Landing Page | Next: Chapter 4 — Login →
Chapter 4 — Login & Account Management
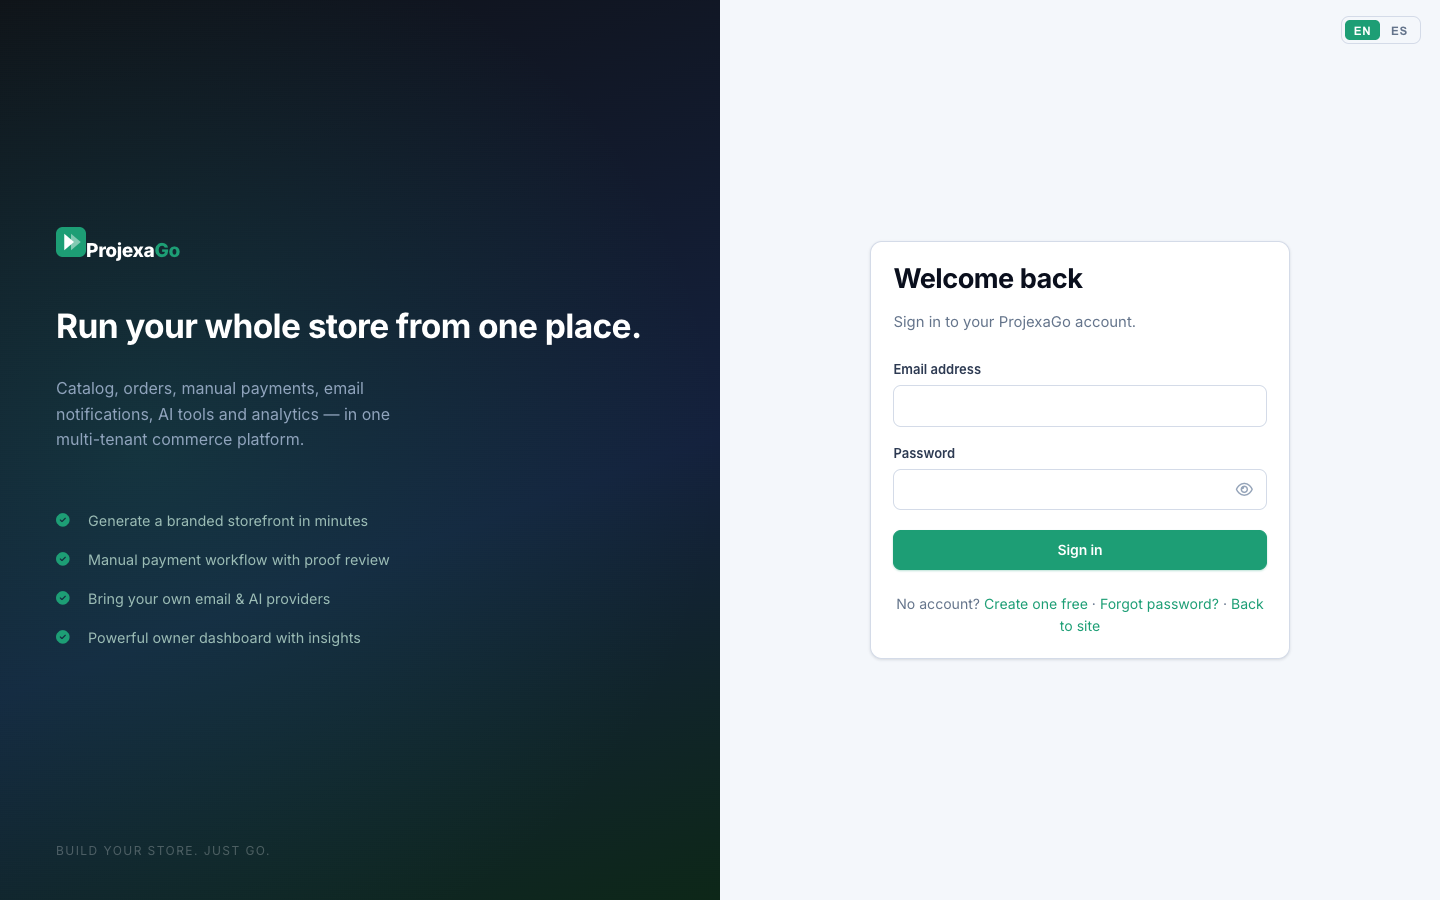
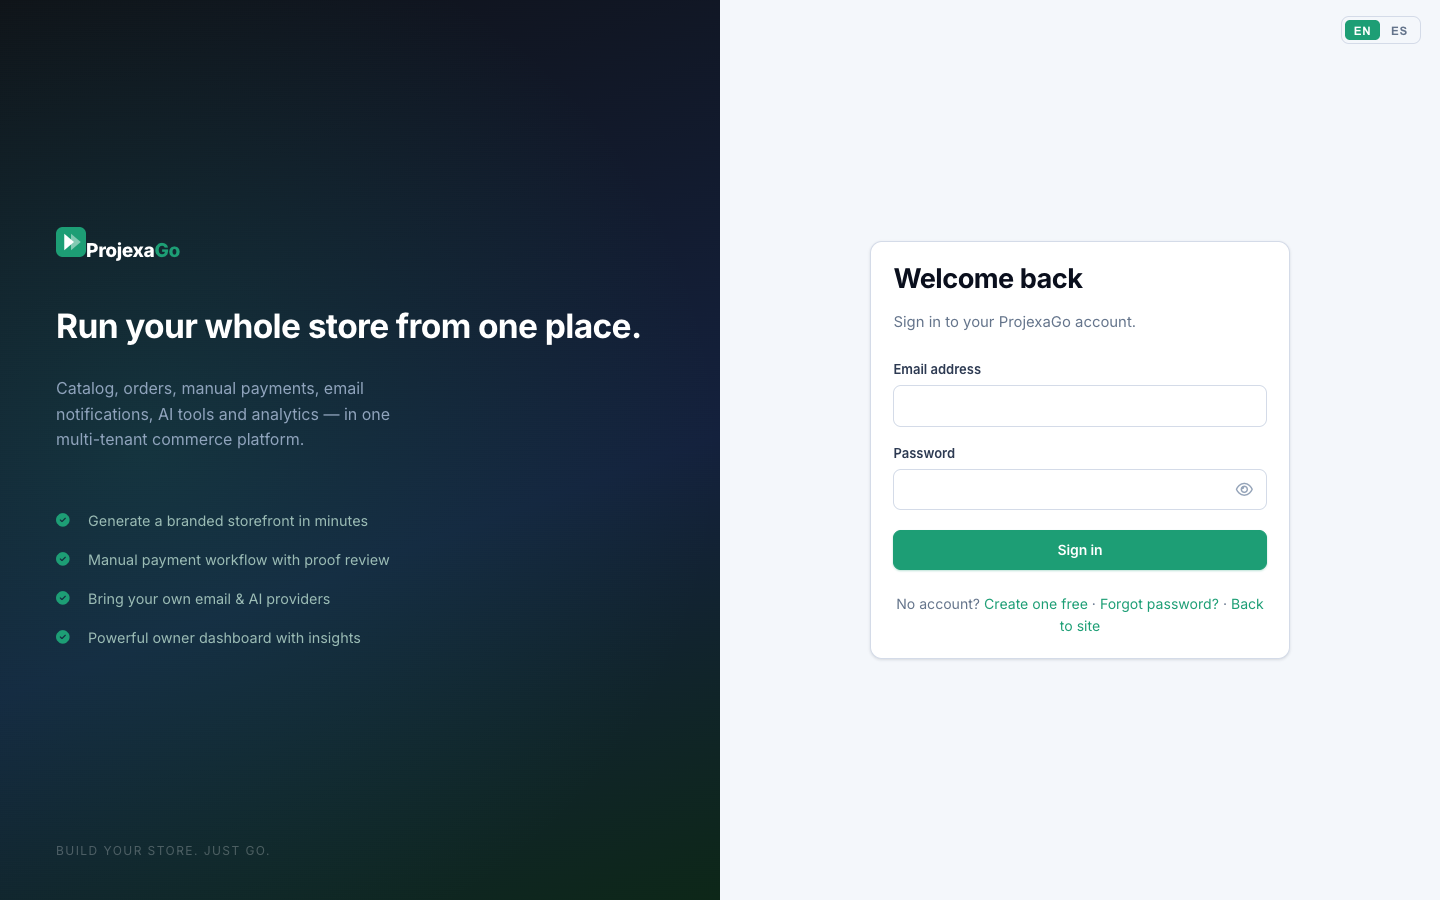
Logging In
- Go to https://app.projexago.com/login
- Enter your email and password
- Click "Log in"
First Login (invited team members)
Invited members receive a temporary password by email. On first login:
- Use the temporary password
- System immediately prompts you to change your password
- Set a new password (minimum 8 characters)
- You cannot proceed until this step is completed
Pending Activation Screen
If your paid plan is awaiting verification, you'll see an activation screen showing:
- Current activation status (step progress)
- Payment status (received / in validation / approved)
- Option to upload or update your payment proof
- Button to resend payment instructions to your email
User Roles
| Role | Access |
|---|---|
| Portal Owner | Full access: settings, billing, team, all operational modules |
| Portal Admin | Team and settings management (not billing) |
| Portal Staff | Orders, customers, catalog — no settings or billing |
Account Actions
Change password (while logged in): Click your name/avatar (top right) → "Change password" → Enter current password → Set new password → Save
Log out: Click your name/avatar → "Log out"
Security Practices
- Use a unique password for ProjexaGo
- Log out on shared devices
- Review the audit log periodically (Admins and Owners)
- Never share credentials — invite team members properly via the Team module
Previous: Chapter 3 — Registration | Next: Chapter 5 — Dashboard →
Chapter 5 — Main Dashboard
Overview
The Dashboard is the platform home screen. It shows a consolidated view of your entire business activity in real time.
Access: Side menu → Dashboard (or automatically on login)
Key Metrics (KPIs)
| KPI | Description |
|---|---|
| Total orders | All orders in the selected period |
| Paid orders | Orders with approved payment |
| Pending orders | Orders awaiting payment or confirmation |
| Rejected orders | Orders with rejected payment or cancelled |
| Revenue | Sum of all approved-payment orders |
| Average order value | Revenue ÷ paid orders |
💡 Tip: Default period is the last 30 days. Use the date range filter to change the window.
Dashboard Sections
| Section | What it shows |
|---|---|
| Orders by status | Count and revenue amount per pipeline status |
| Revenue chart | 30-day daily revenue line chart |
| Best sellers | Top 8 products by units sold |
| Low stock products | Top 10 products below threshold |
| Customer metrics | Total customers + new in last 30 days |
| Pending items | Payment reviews pending + open support cases |
| Recent orders | Last 8 orders with click-through to detail |
| Recent activity | Last 10 audit log entries |
| Email health | Sent/failed emails in last 30 days |
| AI usage | Token usage and estimated cost (Pro/Enterprise) |
| Setup checklist | Initial configuration steps remaining |
Portal Switcher
If you have multiple portals (Pro/Enterprise), use the portal selector in the top bar to switch between them. All dashboard data reflects the currently selected portal.
Management panel Navigation
| Module | Description | Min. Role |
|---|---|---|
| 📊 Dashboard | Business overview | All |
| 🏪 Portals | Store list and management | Owner, Admin |
| 📦 Products | Catalog, variants, import | All |
| 📂 Categories | Categories and nav menus | All |
| 🛒 Orders | Order pipeline | All |
| 💳 Payments | Proof review queue | All |
| 👥 Customers | Buyer CRM | All |
| 👤 Team | Invite and manage members | Owner, Admin |
| 💰 Billing | Subscription and charges | Owner |
| ⚙️ Settings | Portal config and branding | Owner, Admin |
| 🌐 Domains | Custom domains and SSL | Owner, Admin |
| Provider and templates | Owner, Admin | |
| 🤖 AI | AI configuration | Owner, Admin |
| 📈 Reports | Sales, tax, inventory reports | All |
| 🎫 Support | Customer help cases | All |
Previous: Chapter 4 — Login | Next: Chapter 6 — Portal Wizard →
Chapter 6 — Portal Creation Wizard
What is the Portal Wizard?
The Portal Creation Wizard is ProjexaGo's guided tool that walks you step by step through the complete configuration of your store. When finished, your public portal and management panel are ready to operate.
The wizard launches automatically when:
- You just created your account (first portal)
- You click "Create new portal" from the Portals section
⚠️ Important: Your progress is saved automatically as a draft if you close the browser. You can resume from the dashboard or the Portals section.
Live Preview
The wizard features a real-time live preview: as you configure each section, you see exactly how your public portal will look. The screen is split:
- Left panel: Configuration fields
- Right panel: Live store preview
Wizard Steps
Step 1 — Project Type
Select the business type that best describes your operation:
| Type | Description |
|---|---|
| E-commerce | Physical product sales with catalog and cart |
| Services | Service or digital product sales |
| Marketplace | Multi-vendor portal or community |
| SaaS / Software | Digital products or software subscriptions |
Step 2 — Branding
Configure your brand identity:
- Logo (PNG/SVG, transparent background, 400×120px min)
- Dark background logo (optional, for dark headers)
- Primary color (buttons, accents) — HEX format (e.g.
#10B981) - Secondary color (complementary elements)
- Typography (Inter, Roboto, Poppins, Montserrat, and more)
Step 3 — Business Information
| Field | Example |
|---|---|
| Portal name | "Aurora Café" |
| Tagline | "Best coffee in town" |
| Full description | "We are a specialty coffee shop..." |
| Contact email | hello@auroracafe.com |
| Phone | +1 555 0100 |
| +1 555 0100 | |
| Address | 123 Main Street |
| Social links | instagram.com/auroracafe |
Step 4 — Design & Layout
- Hero image (1920×1080px recommended, JPG/PNG/WebP)
- Landing page sections (enable/disable: hero, features, featured products, about, CTA)
- Product listing style (grid or list)
Step 5 — Categories
Build your catalog structure:
- Click "+ Add category"
- Enter name and optional image
- Add subcategories if needed
- Drag to reorder
💡 Tip: You can add and reorganize categories anytime from the Categories module.
Step 6 — Initial Products
Add products in three ways:
- Manually: Fill in the product form one by one
- Bulk import (CSV/XLSX): Download the template, fill it, upload it
- AI-assisted import: Upload any tabular file; AI maps the fields automatically
📌 Note: This step is optional. You can skip it and add products from the Products module later.
Step 7 — Payment Methods
Configure how you receive payments. For each method:
- Click "+ Add payment method"
- Select type: bank transfer / digital wallet / cash / other
- Name it (e.g. "Bank Transfer — Chase")
- Write detailed payment instructions (account number, routing, holder name, etc.)
⚠️ Important: Payment instructions are sent automatically to customers by email. Make them clear and complete.
Step 8 — Policies & Legal
Configure your store policies:
- Terms and conditions
- Privacy policy
- Return policy
- About us
ProjexaGo includes model texts for each policy that you can customize.
Step 9 — Regional Settings
| Field | Options |
|---|---|
| Portal language | Spanish, English |
| Currency | USD, MXN, PEN, COP, EUR, and more |
| Main country | Full country list |
| Tax included in prices | Yes / No |
| Tax rate | Custom % |
Step 10 — Invoicing Configuration
| Field | Description |
|---|---|
| Legal name | Your company's legal name |
| Tax ID | RUC / EIN / VAT number |
| Invoice prefix | e.g., "INV-" → INV-0001 |
| Credit note prefix | e.g., "CN-" |
| Invoice footer | Legal or informational text |
Step 11 — Shipping & Delivery (optional)
- Set your operation country
- Add delivery zones (by city, region or distance range)
- For each zone: name, shipping cost, estimated delivery time
💡 Tip: Add a zone with $0 cost named "In-store pickup" if you offer it.
Step 12 — Publish Your Portal
Your store will be available at:
https://[your-store-slug].projexago.com
Options:
- Publish now: Store is immediately visible to the public
- Save as draft: Store is saved but not publicly visible
Resuming a Saved Wizard
If you closed the wizard before completing it:
- Go to the platform main screen
- Look for the "Continue setting up your portal" banner
- Or go to Portals → click the portal with "Draft" status
- The wizard resumes from where you left off
After the Wizard: Next Steps
- Add more products (Chapter 7)
- Complete your category catalog (Chapter 8)
- Configure email for automatic notifications (Chapter 16)
- Add your custom domain (Chapter 15)
- Invite your team (Chapter 12)
- Activate AI tools if on Pro/Enterprise (Chapter 17)
Previous: Chapter 5 — Dashboard | Next: Chapter 7 — Products →
Chapter 7 — Products & Catalog Management
Overview
The Products module is where you manage your entire commercial catalog. Access via: Side menu → Products
Product List
The main table shows: image thumbnail, name, SKU, category, price, stock, status (active/inactive) and actions.
Filters: Category, Status, Low stock, Search (name/SKU)
Quick edit: Price, stock and status directly from the list
Creating a New Product
Click "+ New product" or "Add product".
Basic Information
| Field | Required |
|---|---|
| Name | ✅ |
| SKU (reference code) | |
| Brand | |
| Category | |
| Status (active/inactive) | ✅ |
| Featured / New flags |
Pricing
| Field | Description |
|---|---|
| Price | Public selling price |
| Compare-at price | "Crossed out" original price (shows discount) |
| Sale label | Custom text (e.g. "Sale!", "2-for-1", "-30%") |
| Tax rate | Assigned tax rate |
Descriptions
- Short description — Shown in catalog list views
- Full description — Detailed rich text on the product page
- SEO description — Meta description for search engines
- Tags — Search keywords (comma-separated)
💡 AI Tip: On Pro/Enterprise, click "Generate with AI" next to description, SEO or tags to auto-generate content based on the product name and category.
Inventory
| Field | Description |
|---|---|
| Track stock | Enable/disable inventory tracking |
| Quantity in stock | Available units |
| Low stock threshold | Alert threshold for dashboard warning |
⚠️ Important: If "Track stock" is on and stock reaches 0, the product shows as "Out of stock" and customers cannot add it to their cart.
Physical Details
- Weight and unit (kg, g, lb, oz)
Product Photos
Upload up to 4 photos per product. First photo = main display image.
Upload: Click the photo area or drag images (JPG, PNG, WebP)
Reorder: Drag photos to reorder (first = primary)
Recommended size: 1200×1200px or larger
Product Variants
For products with multiple versions (size, color, presentation):
- In "Variants" section, click "+ Add variant"
- Set the variant type (e.g. "Size", "Color", "Presentation")
- For each variant option:
- Name (e.g. "Size S", "Red", "250ml")
- SKU (optional)
- Price (can differ from base price)
- Stock quantity
Bulk Product Import
Standard Template (CSV/XLSX)
- Click "Import products" → "Download template"
- Fill in your product data (one row per product)
- Upload the completed file
- Review the validation preview
- Confirm import
File size limit: 25 MB
Template columns:
name | sku | brand | category | price | compare_price | sale_label | description | short_description | seo_description | tags | stock | low_stock_threshold | track_stock | weight | weight_unit | featured | new | active | tax_rate_id
AI-Assisted Import
Upload any tabular file (non-standard format):
- Upload the file
- AI analyzes columns and suggests field mapping
- Review and adjust the mapping
- Confirm import
Best Practices
- Descriptive names — Include brand, model, key variant (e.g. "Single-Origin Coffee Beans 250g — Medium Roast")
- Quality photos — Clean, professional photos on neutral backgrounds
- Consistent SKUs — Define a coding system from the start (e.g. CAT-VARIANT-NUM)
- Update stock regularly — After every offline sale or stock receipt
- Use tags — Add synonyms and related terms to improve search
- Leverage AI — Use AI to generate SEO-optimized descriptions; only needs name and category
Previous: Chapter 6 — Wizard | Next: Chapter 8 — Categories & Menus →
Chapter 8 — Categories & Navigation Menus
Product Categories
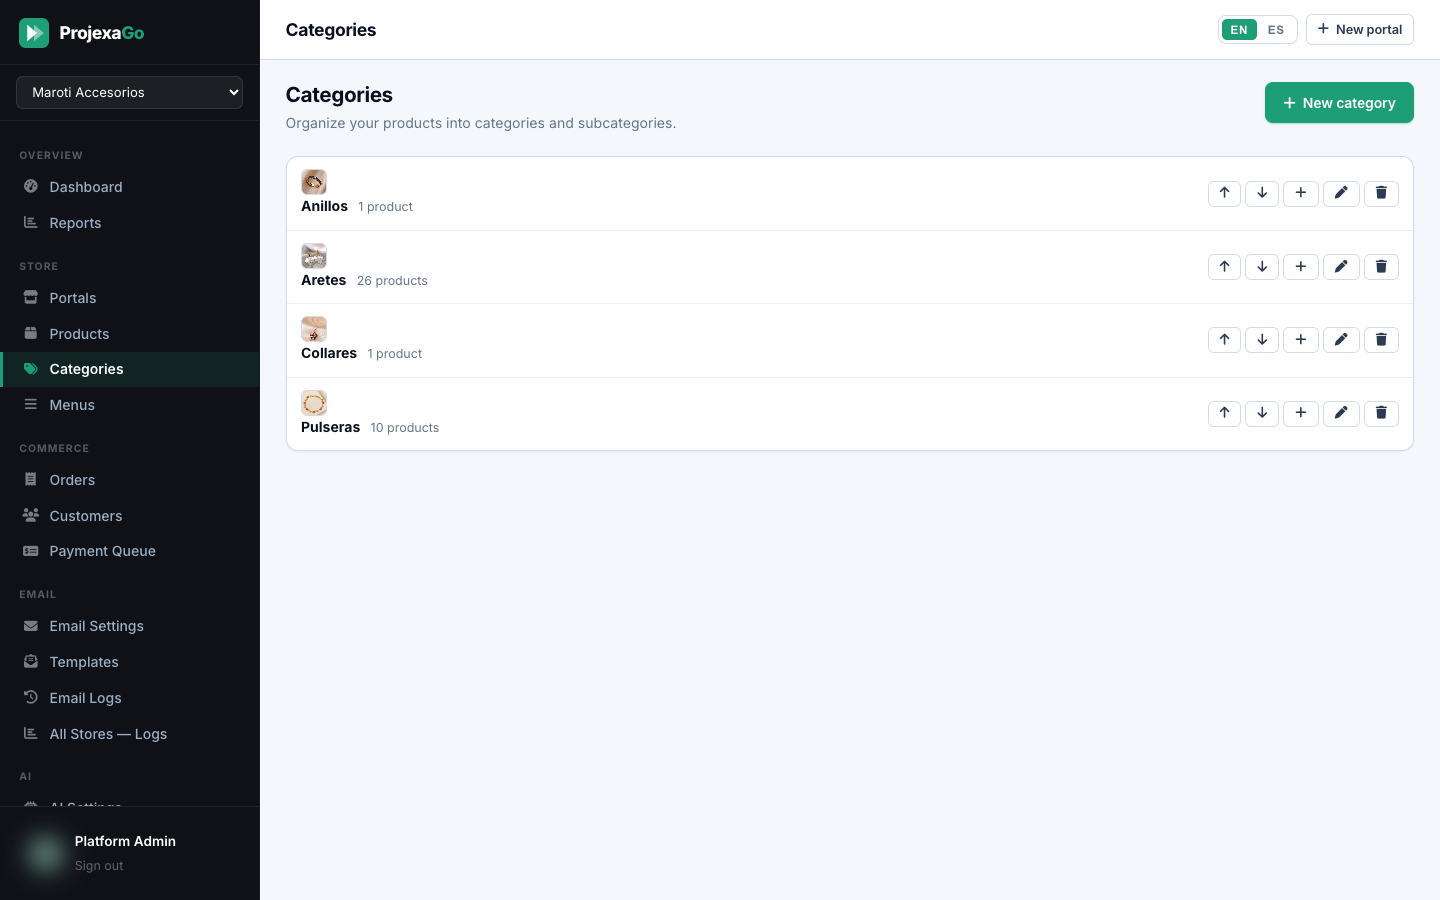
Categories organize your catalog and let customers browse efficiently. Access: Side menu → Categories
Create a Category
- Click "+ New category"
- Enter name, optional image, and parent category (for subcategories)
- Set status (active/inactive) → Save
Hierarchy
ProjexaGo supports two levels:
- Main category (e.g. "Clothing")
- Subcategory (e.g. "T-Shirts", "Pants", "Jackets")
Reorder
Drag rows in the list to change the display order in your store.
⚠️ Important: Deleting a category does NOT delete its products — they become uncategorized. Reassign products before deleting a category.
Navigation Menus
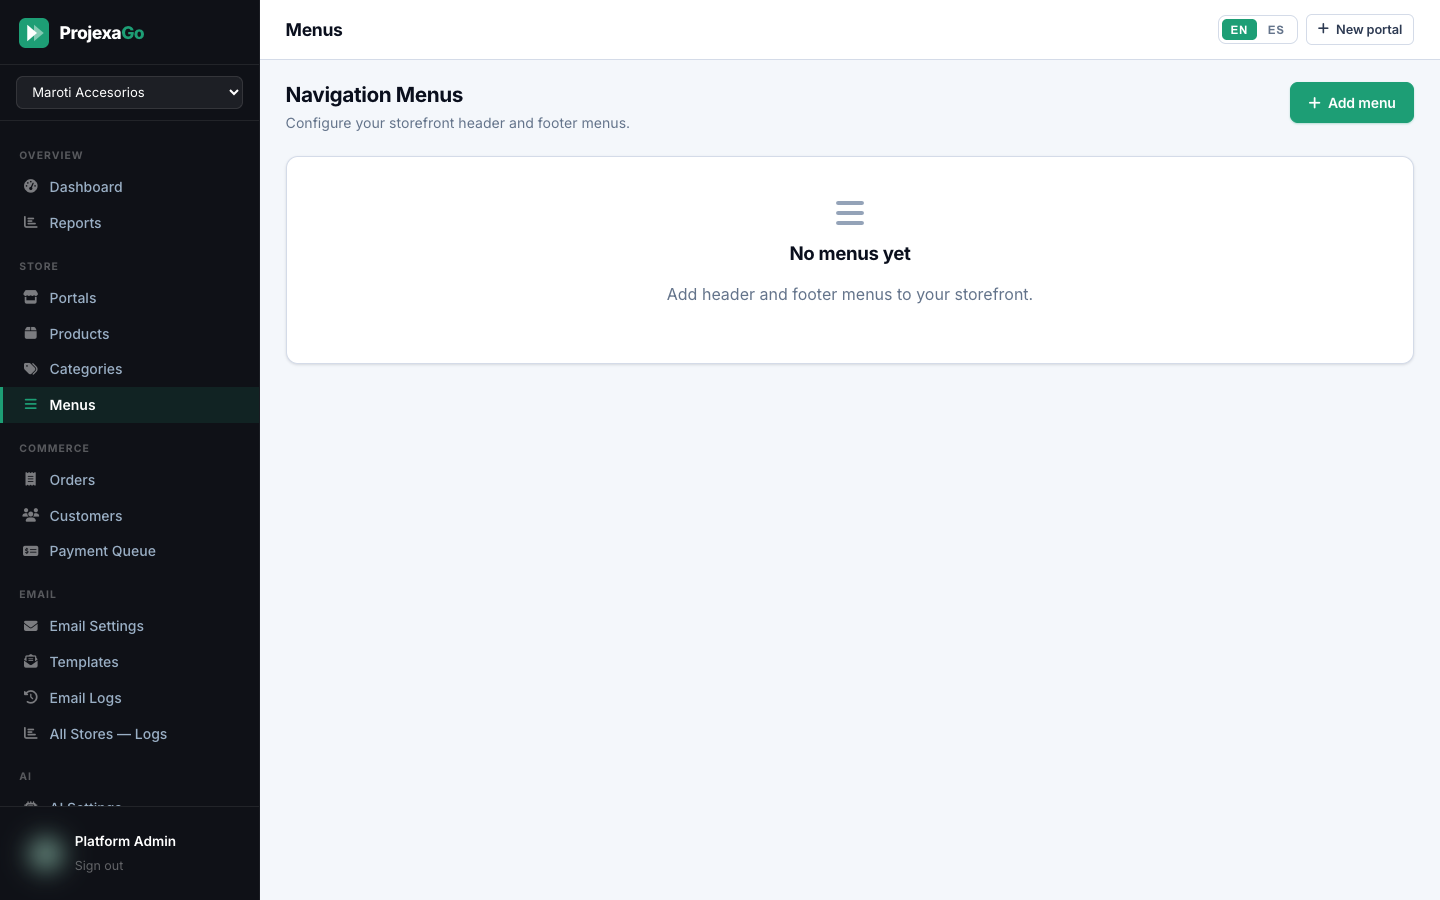
Menus define the navigation structure visible in your storefront's top navbar. They are independent from categories but typically link to them.
Create a Menu
- Go to Categories → Menus → "+ New menu"
- Name the menu (e.g. "Main Menu")
- Add items
Menu Item Fields
| Field | Description |
|---|---|
| Label | Text shown in the menu |
| Link type | Category / Custom URL / Internal page |
| Destination | Category, URL or page to link to |
| Order | Position in the menu |
| Child items | Dropdown sub-items |
Dropdown Menus
You can create multi-level dropdown menus:
Main menu:
  Coffee →
    └── Whole Bean
    └── Ground
    └── Capsules
  Accessories
  About Us
Best Practices
- 5–8 main categories is easier to navigate than 20 scattered ones
- Customer-friendly names — use terms your customers naturally search for
- Category images — visual categories make the store more professional
- Menu-category coherence — ensure menu items link to categories with active products
- Test on mobile — the menu collapses to a hamburger on small screens
Previous: Chapter 7 — Products | Next: Chapter 9 — Order Management →
Chapter 9 — Order Management
Overview
The Orders module is the operational center of your business in ProjexaGo. Access: Side menu → Orders
Order Status Flow
🆕 PENDING CONFIRMATION
   └── Customer placed the order; awaiting your action
   ↓
📧 PAYMENT INSTRUCTIONS SENT
   └── You sent payment instructions to the customer
   ↓
⏳ AWAITING PAYMENT
   └── Customer is processing payment
   ↓
📤 PAYMENT SUBMITTED
   └── Customer uploaded payment proof
   ↓ (can return to AWAITING if rejected)
✅ PAYMENT APPROVED
   └── You verified and approved the proof
   ↓
⚙️ PROCESSING
   └── You are preparing the order
   ↓
📦 READY FOR DELIVERY
   └── Order is packed and ready
   ↓
🚚 SHIPPED
   └── Order has been dispatched
   ↓
🎉 DELIVERED
   └── Customer confirmed receipt

❌ CANCELLED (possible from any pre-shipment status)
📌 Note: Status cannot be skipped — you must advance in order. Cancellation is possible before "Shipped" status.
Order List
Columns: Order number, customer, channel, total, order status, payment status, date
Filters: Status, Payment status, Customer (name/email), Date range, Search (order number)
Order Detail
Clicking an order shows:
- Order information (number, date, channel, notes)
- Products table (name, variant, qty, unit price, subtotal)
- Totals (subtotal, discount, tax, shipping, order total)
- Customer information (name, email, phone, shipping/billing address)
- Status history log (each transition with user and timestamp)
- Payment proof (if uploaded by customer)
Advancing Order Status
The primary action button changes based on current status:
| Current status | Available action |
|---|---|
| Pending confirmation | "Send payment instructions" |
| Instructions sent | "Mark as awaiting payment" |
| Awaiting payment | (waiting for customer to upload proof) |
| Payment submitted | "Review proof" → Approve / Reject |
| Payment approved | "Mark as processing" |
| Processing | "Mark ready for delivery" |
| Ready for delivery | "Mark as shipped" |
| Shipped | "Mark as delivered" |
Sending Payment Instructions
- Click "Send payment instructions"
- Select which payment method(s) to include
- Optionally add a custom message
- Click "Send" — customer receives email with instructions and tracking link
Creating a Manual Sale (In-Store)
For in-person or phone sales:
- Click "+ New order" or "New sale"
- Search/select existing customer or create new
- Add products (search by name or SKU), set quantity and optional price override
- Add internal notes, select channel, payment method
- Confirm the order
Manual orders enter the same status flow as online orders.
Cancelling an Order
- Open the order detail
- Click "Cancel order"
- Select cancellation reason
- Optionally send notification email to customer
- Confirm
⚠️ Important: Cannot cancel orders marked as "Shipped" or "Delivered". Use the Returns flow (Billing module) for those cases.
Automatic Customer Notifications
| Event | Email sent |
|---|---|
| Order placed | Order confirmation with details |
| Instructions sent | Email with payment instructions |
| Payment approved | Payment received confirmation |
| Payment rejected | Notification with retry request |
| Processing | "Your order is being prepared" |
| Shipped | "Your order is on its way" |
| Delivered | Delivery confirmation |
💡 Tip: Customize these emails in Settings → Email → Templates to match your brand.
Previous: Chapter 8 — Categories | Next: Chapter 10 — Payment Queue →
Chapter 10 — Payment Queue & Proof Review
Overview
The Payment Queue is where you review and approve (or reject) payment proofs submitted by customers. Access: Side menu → Payments
Payment Flow
Customer places order → You send instructions →
Customer pays outside system → Customer uploads proof →
Order appears in your queue (status: "Payment Submitted") →
You review → Approve or Reject →
System updates status and notifies customer
Pending Payments List
| Column | Description |
|---|---|
| Order # | Order number |
| Customer | Name and email |
| Amount | Order total |
| Proof | Thumbnail of uploaded proof |
| Submitted | When the customer uploaded it |
| Queue time | How long it's been waiting for review |
Reviewing a Proof
- Click a pending payment to open it
- Review the order detail, full-size proof image/PDF, and payment instructions sent
- Choose an action:
Approve:
- Click "Approve payment"
- Order advances to "Payment Approved"
- Customer receives confirmation email
Reject:
- Click "Reject payment"
- Enter rejection reason (sent to customer):
- "Proof amount doesn't match order total"
- "Proof is unreadable"
- "Payment was sent to wrong account"
- Or write a custom reason
- Order returns to "Awaiting Payment"
- Customer receives email with rejection reason and retry instructions
Managing Payment Methods
Go to Payments → Payment methods to manage available payment options.
Add a Payment Method
- Click "+ New payment method"
- Enter name, type (bank transfer / digital wallet / cash / other)
- Write complete payment instructions
- Set status (active/inactive) → Save
Temporarily Disable a Method
If you cannot receive payments via a specific method, set it to "Inactive". Customers won't see it at checkout until reactivated.
Best Practices
- Review the queue daily — response time directly impacts customer satisfaction
- Be clear in rejection messages — descriptive rejection messages reduce resubmissions
- Verify the exact amount — decide your policy on minor rounding differences in advance
- Keep records — if a proof looks manipulated, save a copy before rejecting
Previous: Chapter 9 — Orders | Next: Chapter 11 — Customers →
Chapter 11 — Customer Management
Overview
The Customers module is ProjexaGo's CRM for your store's registered buyers. Access: Side menu → Customers
📌 Note: Customers are different from team members. Customers register on your public storefront to shop. Team members are invited from the platform to manage the business.
Customer List
Columns: Full name, email, phone, total orders, total spent, status, registration date
Search: By name, email or phone
Filter: Active / Inactive / All
Customer Profile
Clicking a customer shows:
Personal information: Full name, email, phone, company, tax ID, national ID, birth date
Address: Primary shipping and billing address
Order history: All orders with status, amount and date
Support history: All support cases opened by this customer
Editing a Customer
Click "Edit" on their profile to update any field. Useful for correcting shipping addresses or tax information reported by the customer.
Activating / Deactivating
- Set status to "Inactive" to block login access
- The customer's order history and data are preserved
- Reactivate at any time
Customer Self-Service (Storefront)
Customers manage their own experience from the public storefront:
| Function | Description |
|---|---|
| Register / Login | Email and password authentication |
| Profile editing | Name, address, password change |
| Browse catalog | Search, filters, product pages |
| Checkout | Cart, payment method selection |
| Order tracking | Real-time status via unique token |
| Upload payment proof | From their tracking page |
| Download invoices | PDF download from their account |
| Support cases | Open and track cases from the store |
Previous: Chapter 10 — Payment Queue | Next: Chapter 12 — Team →
Chapter 12 — Team Management
Overview
The Team module lets you invite others to help manage your store with role-based access. Access: Side menu → Team (Owner or Admin role required)
Roles
| Role | Access |
|---|---|
| Portal Owner | Full access: settings, billing, team, all operational modules |
| Portal Admin | Team and settings (not billing) |
| Portal Staff | Orders, customers, catalog only — no settings or billing |
Team List
Columns: Name, email, role, status, last login, invitation date
Inviting a Team Member
- Click "+ Invite member"
- Enter email, full name, and role (Owner / Admin / Staff)
- Click "Send invitation"
The system creates the account and emails the new member with temporary credentials and login instructions.
💡 Tip: Assign Staff role to new hires and elevate permissions gradually. Follow the principle of least privilege.
Role Management
- Open the member profile (or click their row in the table)
- Select the new role
- Save — takes effect on their next login
Activate / Deactivate Members
Set status to "Inactive" to suspend access without deleting the account. Set back to "Active" to restore.
⚠️ Protection: Cannot deactivate the last active Owner of a portal.
Team Member Limits by Plan
| Plan | Max members |
|---|---|
| Free Trial | 2 |
| Basic | 5 |
| Pro | 20 |
| Enterprise | 500 |
Previous: Chapter 11 — Customers | Next: Chapter 13 — Billing →
Chapter 13 — Billing & Subscription
Overview
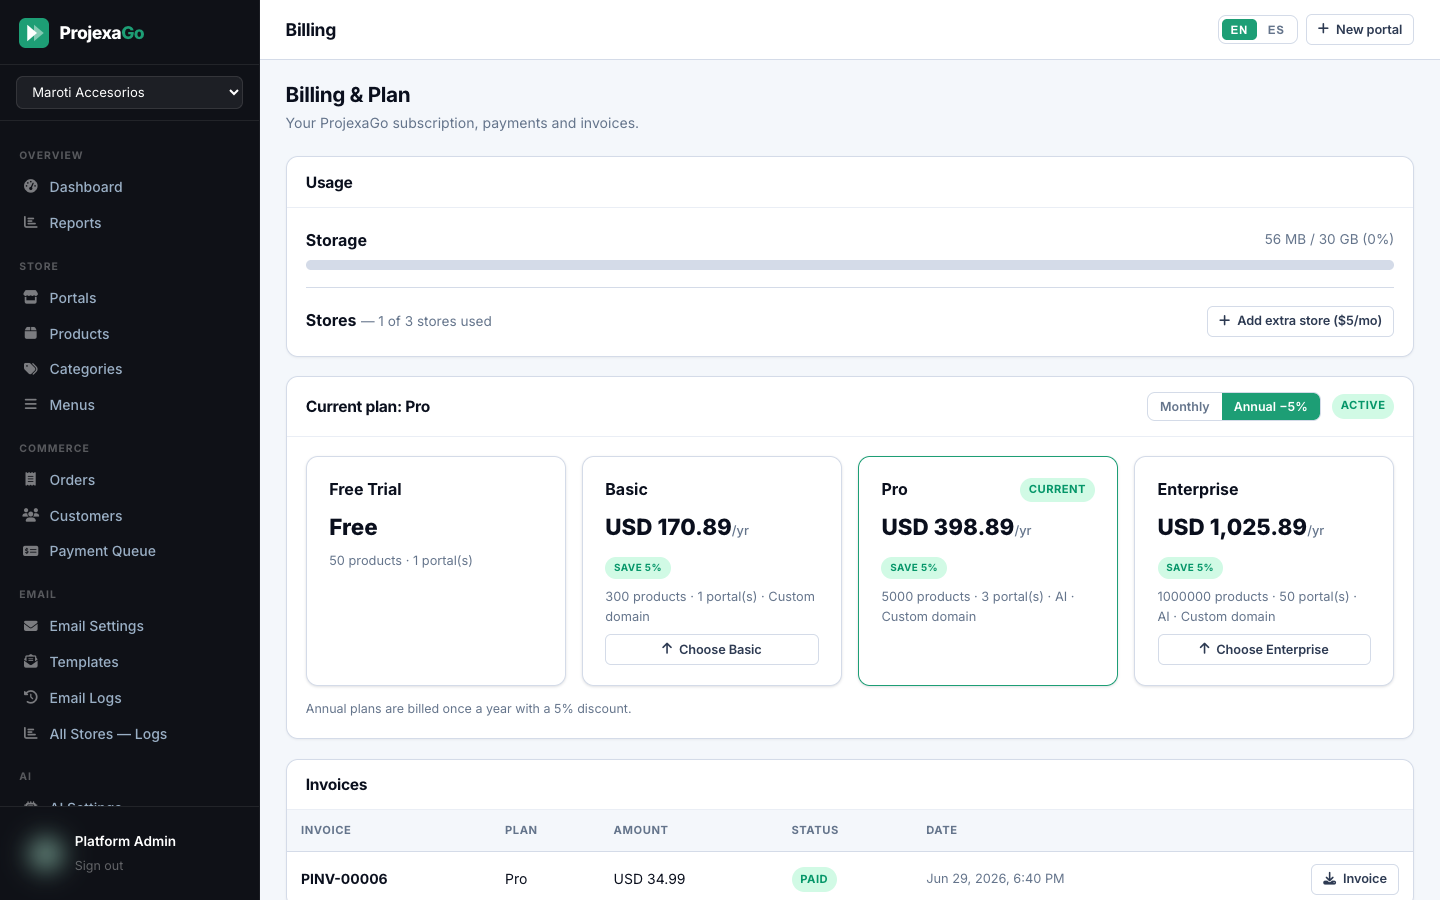
The Billing module (Owner role only) manages your ProjexaGo subscription, charges, invoicing to your customers, and add-ons. Access: Side menu → Billing
Your Subscription
Shows: Active plan, status, period start/end, contracted price, stores used vs. max, storage used vs. max, active users vs. max.
Changing Plans
- Click "Change plan"
- Select the new plan
- A proportional charge is generated — pay via email instructions
Charge History
| Column | Description |
|---|---|
| Date | Charge date |
| Description | Type (subscription, add-on, overage) |
| Amount | Charge amount |
| Status | Pending / Paid / Overdue / Voided |
| Invoice | Download PDF |
Paying a Pending Charge
- Go to Billing → Pending charge
- Click "View payment instructions" to receive details by email
- Make payment outside the system
- Click "Upload proof" → upload image or PDF
- ProjexaGo team reviews and activates your account
Add-ons
Extra Stores ($5.00/month recurring)
Go to Billing → Add-ons → "Add extra store" — available immediately.
Extra Storage ($1.00/GB/month, billed in arrears)
- 20% tolerance buffer before blocking uploads
- Billed automatically based on usage
- Email alerts as you approach your limit
Customer Invoices
Issue an Invoice
- Click "+ New invoice" → select the linked order
- Verify customer data and line items → "Issue invoice"
- Available for PDF download and email sending
Void an Invoice
Open the invoice → "Void" → Confirm. Voided invoices remain in history marked as "Voided".
Credit Notes
For formal return documentation:
- Go to Billing → Credit notes → "+ New credit note"
- Link to the original invoice, specify the credit amount
- Issue — available as PDF and email to customer
Tax Rates
- Go to Billing → Tax rates → "+ New rate"
- Configure name (e.g. "VAT"), percentage (e.g. 20%), and whether it's included in prices
- Assign rates to products from the Products module
Previous: Chapter 12 — Team | Next: Chapter 14 — Settings →
Chapter 14 — Portal Settings
Overview
Settings contains all portal configuration grouped by area. Access: Side menu → Settings (Owner or Admin required)
Branding Settings
| Field | Description |
|---|---|
| Primary logo | Navbar logo (PNG/SVG, transparent background) |
| Dark logo | For use on dark backgrounds |
| Primary color | Buttons, accents (HEX) |
| Secondary color | Complementary elements (HEX) |
| Typography | Main store font |
| Hero image | Landing page banner |
Changes apply to your public store immediately.
Business Information
Name, tagline, full description, contact email, phone, WhatsApp, address, social media links.
Commerce Settings
| Field | Options |
|---|---|
| Portal language | English / Spanish |
| Currency | USD, MXN, EUR, and 50+ more |
| Country | Full country list |
| Tax included in prices | Yes / No |
| Allow customer registration | Yes / No |
| Require login to purchase | Yes / No |
Store Policies
Edit your store's legal policy texts:
- Terms and conditions
- Privacy policy
- Return policy
- About us
All displayed on dedicated pages accessible from the store footer.
Shipping Configuration
Delivery zones:
- Click "+ New zone"
- Enter name, cost, estimated delivery time, description
- Save
Customers see available zones during checkout.
Invoicing Configuration
Legal details for issuing invoices to customers:
- Legal company name, Tax ID, invoice prefix, credit note prefix, footer text
Landing Page Configuration
Change the project type (E-commerce / Services / Marketplace / SaaS) and which sections appear on your store's landing page.
Publish / Unpublish Portal
- Publish: Store is publicly visible
- Unpublish (draft): Store disappears from public URL; management panel continues working normally
⚠️ Important: Unpublishing prevents customers from accessing the store or placing orders. Existing orders are not affected.
Audit Log
Settings → Audit Log — Full history of all actions in the system:
- User who performed the action
- Action type (create, update, approve, etc.)
- Affected entity
- Timestamp
Filter by user, action type, date range.
Previous: Chapter 13 — Billing | Next: Chapter 15 — Custom Domains →
Chapter 15 — Custom Domains
Overview
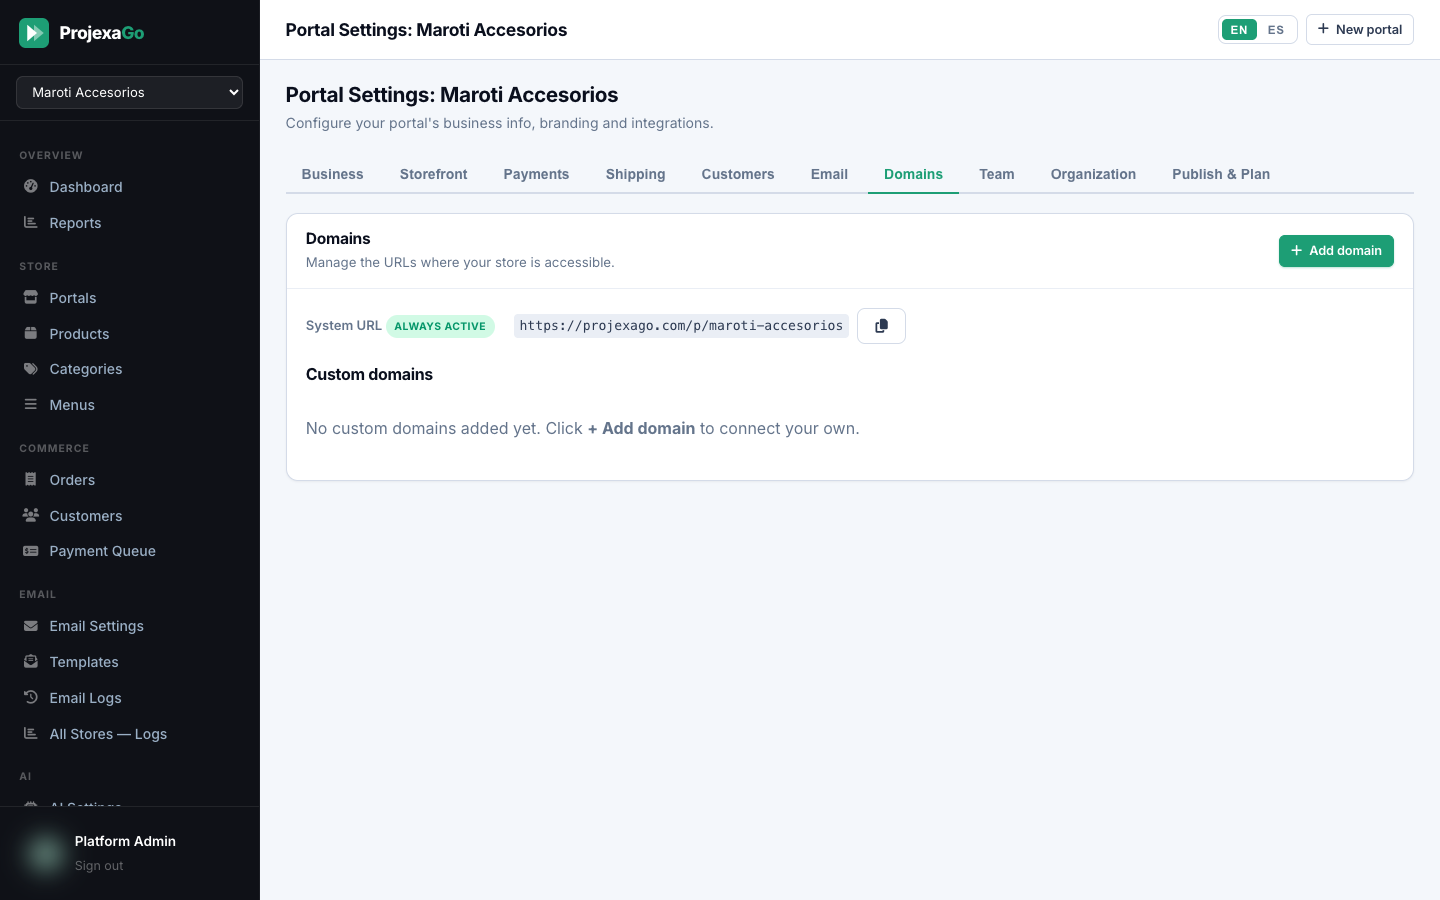
Custom domains (Basic, Pro and Enterprise plans) let you use your own web domain for your store instead of the ProjexaGo subdomain.
Example:
- Without:
my-store.projexago.com - With:
shop.mybusiness.comorwww.mybusiness.com
Access: Side menu → Domains (Owner or Admin)
Domain Lifecycle
1. PENDING DNS → Added; waiting for DNS configuration
2. DNS VERIFIED → TXT record confirmed; domain valid
3. PROVISIONING TLS → SSL certificate being generated automatically
4. ✅ ACTIVE → Store live at your domain with HTTPS
⚠️ FAILED (DNS/TLS error — retryable)
Adding a Custom Domain
Step 1: Add the domain in ProjexaGo
- Go to Domains → + Add domain
- Type your domain (e.g.
shop.mybusiness.comorwww.mybusiness.com) - Click "Add" — system shows your specific DNS instructions
Step 2: Configure DNS at your registrar
For a subdomain (e.g. shop.mybusiness.com):
Type: CNAME
Name: shop
Value: cname.projexago.com
TTL: 3600 (or Auto)
For a root domain (e.g. mybusiness.com):
Type: A
Name: @ (or leave blank)
Value: [IP provided by ProjexaGo]
TTL: 3600

Type: TXT (verification)
Name: _projexago
Value: [verification code provided]
TTL: 3600
Configure these records in your domain registrar's DNS panel (GoDaddy, Namecheap, Cloudflare, etc.).
📌 Note: DNS changes can take from minutes to 48 hours to propagate globally. ProjexaGo checks automatically at regular intervals.
Step 3: Wait for verification and SSL
Once DNS propagates:
- ProjexaGo verifies the domain automatically
- Status changes to "DNS verified"
- System auto-provisions the SSL certificate
- When status reaches "Active" — your store is live at your domain with HTTPS
💡 Tip: You don't need to purchase or configure SSL certificates. ProjexaGo handles it completely.
Primary Domain
If you have multiple domains, one is the primary domain used for:
- Customer email links
- SEO canonical URL
- Official store address shown to customers
To change: Click the target domain → "Set as primary"
System URL (backup)
Your store always remains accessible at:
https://[your-slug].projexago.com
This URL works as a permanent backup regardless of custom domain status.
Troubleshooting
| Problem | Solution |
|---|---|
| Still "Pending DNS" after 48h | Verify records were created correctly. Use dnschecker.org to check propagation. |
| Status shows "Failed" | Click "Retry verification". If persistent, re-check DNS records. |
| Domain shows "Not secure" | SSL may need a few extra minutes. If after 30 min still no HTTPS, contact support. |
Previous: Chapter 14 — Settings | Next: Chapter 16 — Email →
Chapter 16 — Email Configuration
Overview
ProjexaGo sends automatic emails to your customers at every stage of the order cycle. The Email module lets you configure the sending provider, customize templates and monitor delivery health.
Access: Side menu → Email (Owner or Admin)
Email Providers
| Provider | Type | Notes |
|---|---|---|
| Platform email | Managed | ProjexaGo sends on your behalf (generic domain). Works without configuration. |
| Gmail / Google Workspace | SMTP | Use your Gmail or G Suite account |
| Microsoft 365 / Outlook | SMTP | Use your Microsoft corporate account |
| Zoho Mail | SMTP | Use your Zoho account |
| Custom SMTP | SMTP | Any SMTP server (Resend, SendGrid, Mailgun, etc.) |
Configuring SMTP
Gmail
- Enable 2-step verification on your Google account
- Generate an App Password (Google Account → Security → 2-Step Verification → App passwords)
- In ProjexaGo, select "Gmail"
- Enter: Sender email, sender name, app password
- Click "Test configuration" → if successful, "Save"
Microsoft 365 / Outlook
Select "Microsoft 365" → enter email, sender name, password (or app password) → test → save.
Custom SMTP
Select "Custom SMTP" → enter host, port (587/TLS or 465/SSL), username, password, sender email, sender name → test → save.
💡 Recommendation: For high volumes (100+/day), use a dedicated transactional provider like Resend, SendGrid or Mailgun — more reliable than Gmail/Outlook for automatic emails.
Configuration Levels
- Organization level: Default email provider for all your portals
- Portal level: Each portal can have its own different provider
Switch between levels: Email → Email source → "Use organization email" or "Use this portal's own email"
Email Templates
ProjexaGo includes professional templates for all order cycle emails.
Available templates: Order confirmation · New order (to owner) · Payment instructions · Payment received · Payment approved · Payment rejected · Status update · Order delivered · Account created · Portal created · Customer message · Support update · Invoice issued · Credit note issued · Subscription charge created · Subscription payments (multiple stages) · Renewal reminder · Past due notice · Suspension notice
Editing a Template
- Select the template
- Modify the subject and HTML body
- Available variables (auto-replaced):
{{customer_name}}·{{order_number}}·{{order_total}}{{store_name}}·{{tracking_url}}·{{payment_instructions}}- And more per template type
- Click "Save template"
Send a Test Email
From the template editor, click "Send test" to receive the email in your inbox and verify appearance.
Email Logs & Statistics
Statistics (last 30 days): Total sent, successful, failed, delivery rate
Logs: Per-email record with recipient, template used, status, timestamp, error message (if failed)
Troubleshooting
| Problem | Solution |
|---|---|
| Emails going to spam | Configure SPF/DKIM records on your email domain. Use a transactional provider for high volumes. |
| "Authentication Failed" error | Gmail: use an App Password, not your regular password. |
| Emails not sending | Run a configuration test from the panel. Check logs for the specific error. |
| Generic sender name showing | Update "Sender name" in email configuration settings. |
Previous: Chapter 15 — Domains | Next: Chapter 17 — AI →
Chapter 17 — Artificial Intelligence (AI)
Overview
ProjexaGo's AI tools are available on Pro and Enterprise plans. They automate and enhance various business tasks — from generating product descriptions to analyzing sales performance.
Access: Side menu → AI (Owner or Admin, Pro/Enterprise plan)
AI Providers
| Provider | Models | Use cases |
|---|---|---|
| Anthropic (Claude) | Claude 3.5 Sonnet, Claude 3 Haiku | Descriptions, analysis, conversational assistant |
| OpenAI | GPT-4o, GPT-4o mini | Descriptions, analysis, conversational assistant |
📌 Note: Bring your own API key from either provider. Keys are stored encrypted. If you don't configure your own key, AI runs on platform credits if available in your plan.
Configuring an AI Provider
- Go to AI → Configuration
- Select the provider (Anthropic or OpenAI)
- Enter your API key
- Set a monthly token limit (to control spend)
- Click "Test connection" → if successful, save
Available AI Features
| Feature | Description |
|---|---|
| Product descriptions | Auto-generates full product description |
| Product SEO | Generates search-engine-optimized meta descriptions |
| Product titles | Optimizes product name for clarity and SEO |
| Product tags | Auto-generates relevant search tags |
| Commerce insights | Analyzes sales performance and gives recommendations |
| Customer replies | Generates draft replies for support cases |
| Store assistant | AI chatbot to answer customer questions in the store |
| Catalog import | AI field mapping for non-standard import files |
Each feature can be individually enabled or disabled.
Generating AI Content (Products)
- Go to a product's detail page
- Click "Generate with AI" next to the description, SEO, or tags field
- AI analyzes the product name, category and price
- Generates professional content in seconds
- Review, edit if needed, accept → Save
💡 Tip: Quality improves when the product has a descriptive name, an assigned category, and a brand specified. The more context the AI has, the better the output.
The AI Assistant (Business Analysis)
A conversational interface where you ask the AI questions about your business:
- "What are my best-selling products this month?"
- "How many orders are waiting for payment review?"
- "Which products are below low-stock threshold?"
- "What's the average order value for the last 30 days?"
- "Which customers haven't purchased in the last 60 days?"
The AI has real-time access to your store data and delivers analysis directly in the chat.
AI-Assisted Catalog Import
When importing non-standard product files (see Chapter 7):
- Upload your file (any tabular format)
- AI analyzes columns and proposes field mapping
- Review and adjust mapping
- Confirm import
Usage Monitoring
AI → Usage:
- Input tokens used (text sent to AI)
- Output tokens generated (AI responses)
- Estimated cost at provider rates
- Daily history chart
💡 Tip: Set a monthly token limit to avoid billing surprises from your AI provider. The system stops using AI once the limit is reached until the next month.
Previous: Chapter 16 — Email | Next: Chapter 18 — Reports →
Chapter 18 — Reports & Analytics
Overview
The Reports module provides detailed business analysis for better decision-making. Access: Side menu → Reports (all roles)
Available Report Types
Sales Report
Metrics: Total orders (by status), total revenue, average order value, daily/weekly/monthly trend
Filters: Date range, order status, sales channel
Export: CSV, XLSX, PDF
Tax Report
Metrics: Total sales by tax rate, tax collected amount, taxable base, period breakdown
Filters: Billing period, specific tax rate
Export: CSV, XLSX, PDF
Inventory Report
Metrics: Full product list with current stock, low-stock products, out-of-stock products, total inventory value
Filters: Category, status, low-stock only / out-of-stock only
Export: CSV, XLSX, PDF
Exporting Reports
| Format | Best for |
|---|---|
| CSV | Import into Excel, Google Sheets or other systems |
| XLSX | Open directly in Excel with formatting |
| Print or share with accountants, partners |
Steps: Configure filters → Click "Export" → Select format → File downloads automatically.
Dashboard vs. Reports
| Need | Use |
|---|---|
| Current business status at a glance | Dashboard |
| Detailed period analysis | Reports |
| Data for accounting or auditing | Reports (with export) |
| Identify growth trends | Reports (sales chart) |
| Which products to restock | Dashboard (low stock) or Inventory Report |
Previous: Chapter 17 — AI | Next: Chapter 19 — Support →
Chapter 19 — Support & Help Cases
Overview
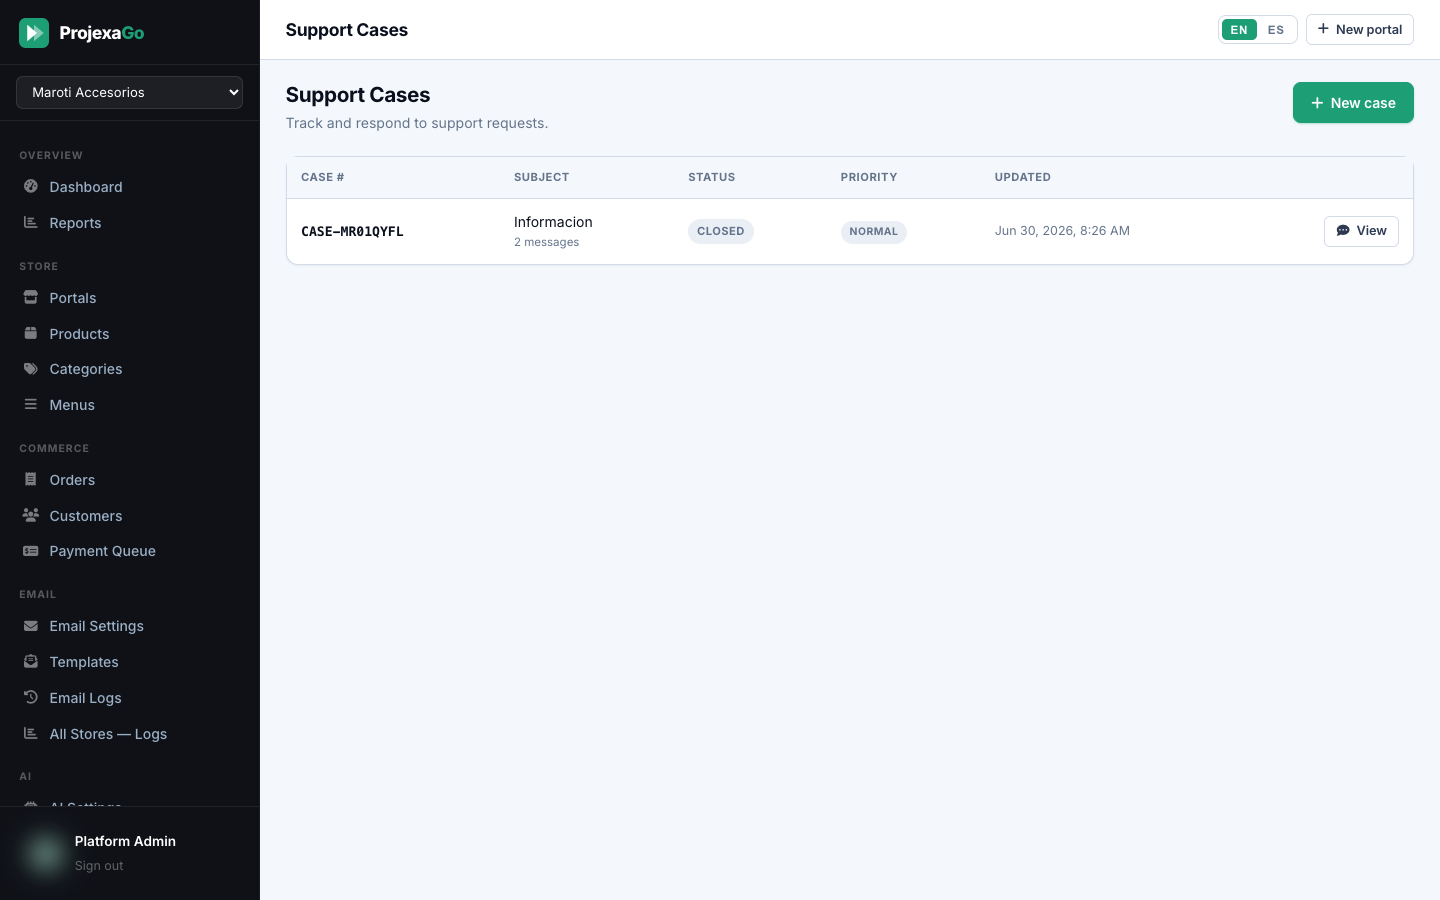
The Support module manages help cases opened by your customers from the public storefront. Access: Side menu → Support (all roles)
Case List
Columns: Case #, customer, title, status (Open / In Progress / Pending / Resolved / Closed), priority (Low / Medium / High / Urgent), linked order, last update
Filters: By status, priority, date range
Case Detail
Shows: Customer data, problem description, linked order, message history (chronological conversation), current status and priority.
Reply to a Case
- Write your reply in the message field
- Click "Send" — customer receives your reply by email
- Customer can respond from their email or from the storefront
Update Status & Priority
- Open → In Progress → Pending (waiting for customer info) → Resolved → Closed
- Update priority based on urgency
💡 Tip: Use "Pending" when waiting for customer response. "Resolved" when the problem is fixed (but follow-up may come). "Closed" when definitively finished.
How Customers Open Cases
From the public storefront:
- My account → Support → "Open case"
- Write title and description, optionally link to an order, set priority
- Submit — customer receives confirmation email with case number and can track from their account
Best Practices
- Respond quickly — first response time directly impacts customer satisfaction. Aim for under 24 hours.
- Be specific — mention the order number, product or specific situation. Avoid generic responses.
- Keep status updated — customers know you're working on their problem when status changes.
- Close resolved cases — keeps your active case list clean and meaningful.
Previous: Chapter 18 — Reports | Next: Chapter 20 — Mobile App →
Chapter 20 — ProjexaGo Mobile App
Overview
The ProjexaGo mobile app is the native iOS and Android version of the platform, letting you manage your store from anywhere.
Availability:
- PWA (Progressive Web App): Install directly from your phone's browser — available now
- App Store (iOS): Coming soon
- Google Play (Android): Coming soon
Installing the App (PWA)
On iPhone / iPad (iOS 15+)
- Open Safari on your iPhone
- Go to https://app.projexago.com
- Log in with your account
- Tap the share button (box with arrow icon)
- Select "Add to Home Screen"
- Name the app "ProjexaGo" and tap "Add"
- The app appears on your home screen like a native app
On Android (Chrome 100+)
- Open Chrome → go to https://app.projexago.com
- Log in
- Chrome shows an install banner, or tap menu (⋮) → "Install app" or "Add to Home screen"
- Confirm → app appears on home screen
Main Screens
| Screen | Description |
|---|---|
| Dashboard | Daily orders, revenue, pending items, low stock |
| Store selector | Switch between portals (multi-store plans) |
| Orders | Full order list, status advancement, new sale creation |
| Catalog | Products list, edit details, update price/stock |
| Customers | Customer list, profile view, order history |
| More | Settings, team, domains, billing, invoices |
Mobile vs. Web Management panel
| Feature | Web | Mobile |
|---|---|---|
| Full dashboard | ✅ | ✅ (simplified) |
| Order management | ✅ | ✅ |
| Full catalog | ✅ | ✅ (basic view/edit) |
| Bulk import | ✅ | ❌ |
| Category editor | ✅ | ❌ |
| Email configuration | ✅ | ❌ |
| AI configuration | ✅ | ❌ |
| Email templates | ✅ | ❌ |
| Reports & export | ✅ | ❌ |
| New in-person sale | ✅ | ✅ |
| Creation wizard | ✅ | ✅ |
| Team management | ✅ | ✅ (basic) |
| Domains | ✅ | ✅ (view) |
| Billing | ✅ | ✅ (view) |
💡 Tip: Use the web management panel for settings, imports, reports and complex management. Use the mobile app for daily order review, real-time stock updates and point-of-sale transactions.
Automatic Updates
As a PWA, the app updates automatically when new versions are released. No manual update or reinstall needed — just open the app with internet connection.
Previous: Chapter 19 — Support | Next: Chapter 21 — FAQ →
Chapter 21 — Frequently Asked Questions (FAQ)
About the Platform
Do I need technical knowledge to use ProjexaGo?
No. Everything — branding, catalog, payments, emails and AI — is configured through the wizard and management panel without writing any code. If you can use a spreadsheet, you can use ProjexaGo.
Does ProjexaGo charge a commission on my sales?
No. ProjexaGo charges a fixed monthly/annual subscription, with zero commissions on your sales. 100% of each order's value is yours.
Is my data isolated from other businesses?
Yes. ProjexaGo is multi-tenant by design. Every product, order, customer, email and configuration is scoped to your account and never shared.
Can I have multiple stores?
Yes. Pro plan supports up to 3 stores. Enterprise supports up to 50. Each store is completely independent with its own catalog, customers and orders.
Does it work in my country?
ProjexaGo supports multiple currencies, languages and countries. The manual payment system works with any bank or digital wallet in your country.
About Payments
How do payments work?
ProjexaGo uses a manual payment workflow. The customer places an order, you send payment instructions (bank details, wallet, etc.), the customer pays and uploads proof, and you review and approve it. All steps generate automatic email notifications.
Does ProjexaGo process payments directly (like Stripe or PayPal)?
No. ProjexaGo is not a payment gateway. It's designed for businesses that receive payments via bank transfer, digital wallets, cash or other manual methods. Direct credit/debit card integration is not currently available.
What if a customer uploads a fake proof?
You always review and verify the proof before approving payment — it's never auto-approved. If you detect an invalid or manipulated proof, reject it with an explanatory message.
About Plans
Does the Free Trial require a credit card?
No. Start the 14-day Free Trial without entering any payment information.
What happens when the Free Trial ends?
Your account stays active but limited. You cannot create new orders until you select a paid plan. Your data (products, customers, orders) is preserved.
Can I change plans at any time?
Yes. Update or change your plan at any time from the Billing section. Changes apply when the new charge payment is confirmed.
About Email & AI
Can I use my own Gmail account to send emails?
Yes. Connect Gmail using an App Password (not your regular password). You can also use Microsoft 365, Zoho, or any SMTP server.
Is email configuration required?
Not required. If not configured, emails are sent from ProjexaGo's generic service. However, for better reliability and branding, connecting your own provider is strongly recommended.
Does the AI generate content in English?
Yes. The AI generates descriptions, SEO and tags in the language configured for your portal (Spanish or English).
How much does AI cost?
AI is included in Pro and Enterprise plans. You bring your own Anthropic or OpenAI API key and pay directly to them based on usage. ProjexaGo doesn't charge extra for AI functionality.
About Domains
Can I use a domain I already own?
Yes. Add the domain in ProjexaGo and make DNS changes at your current registrar (GoDaddy, Namecheap, Cloudflare, etc.). No domain transfer needed.
Does ProjexaGo include SSL certificates?
Yes. ProjexaGo automatically generates and renews SSL (HTTPS) certificates for your custom domain. No purchase or configuration needed on your part.
About the Mobile App
Does the mobile app cost extra?
No. The mobile app is included in all plans at no additional cost.
Does the app work offline?
The app requires an internet connection to operate, as it works in real time with your store data.
Support & Contact
How do I contact ProjexaGo support?
Email admin@projexaai.com. Support level depends on your plan: community (Free Trial), email (Basic), priority (Pro), dedicated (Enterprise).
Previous: Chapter 20 — Mobile App | Next: Chapter 22 — Troubleshooting →
Chapter 22 — Troubleshooting
Access & Account Issues
| Symptom | Solution |
|---|---|
| "Invalid credentials" | Verify email and password are correct. Email is case-sensitive. |
| Forgot password | Use "Forgot your password?" on the login screen. |
| Account locked | After multiple failed attempts, wait 15 minutes and try again. If persists, contact support. |
| "Pending activation" status | Payment is still under review. Check the activation screen. Ensure you've uploaded proof. |
| Team member: "Invalid password" | New members receive a temporary password they must change on first login. Ask the owner to resend credentials. |
Portal & Storefront Issues
| Symptom | Solution |
|---|---|
| Store shows 404 error | Verify the portal is published (not draft) in the Portals section. |
| Store changes not reflected | Try incognito mode or force-refresh (Ctrl+Shift+R / Cmd+Shift+R). |
| Products not showing in store | Check: product status = Active, category is Active, stock > 0 (if tracking enabled). |
Order Issues
| Symptom | Solution |
|---|---|
| Customer didn't receive order email | Check Email → Logs. If "sent" — likely in spam. If "failed" — check email configuration. |
| Cannot advance order status | Verify you're following the correct flow. Some statuses require customer action first. |
Payment Issues
| Symptom | Solution |
|---|---|
| Customer uploaded proof but not in queue | Ask customer to verify upload was successful. Try refreshing. If persists, ask for re-upload. |
| Proof is unreadable | Reject with message requesting a clearer image or PDF. |
Email Issues
| Symptom | Solution |
|---|---|
| Emails going to spam | Configure SPF/DKIM records. Use a transactional provider for high volumes. |
| "Auth Failed" for Gmail | Must use an App Password, not regular Gmail password. |
| Emails not sending | Run configuration test from the panel. Check logs for specific error message. |
Domain Issues
| Symptom | Solution |
|---|---|
| Still "Pending DNS" after 48h | Verify DNS records exist. Use dnschecker.org to check propagation. If correct, click "Retry verification". |
| SSL error after DNS verified | SSL provision can take up to 30 extra minutes. If >1 hour, contact support with your domain. |
Mobile App Issues
| Symptom | Solution |
|---|---|
| App not updating | Close app completely and reopen with internet connection. |
| Cannot install on iPhone | Must use Safari (not Chrome or other browsers) on iOS. |
Bulk Import Issues
| Symptom | Solution |
|---|---|
| Import file fails validation | Check: file ≤ 25 MB, required columns (name, price) present, use downloadable template as base. |
| Imported products not in store | Verify imported products have Active status. |
Contacting ProjexaGo Support
| Channel | Response time | Plan |
|---|---|---|
| Email: admin@projexaai.com | 48 business hours | All |
| Priority email support | 24 business hours | Basic |
| Priority support | 8 business hours | Pro |
| Dedicated support | Real-time | Enterprise |
When contacting support, include:
- Your registered account email
- Your portal/store name
- Detailed problem description
- Screenshots if applicable
- Order number if order-related
Previous: Chapter 21 — FAQ | Back to index: → Index